

In this tutorial, we have explained Paytm Payment Gateway Integration in Codeigniter framework. In today scenario Paytm is the most popular and trusted mobile wallet system. As per the Economic time’s survey Paytm reached approx 200 million registered users. Yes, that is a huge number.
Advantage
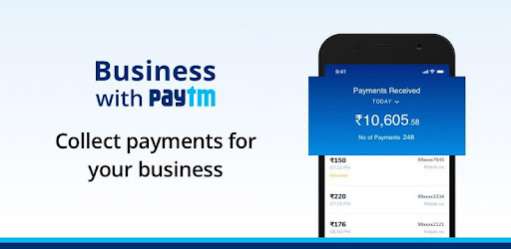
Today many eCommerce or other service websites start using Paytm payment gateway. Its also reduce the risk to exposing credit card details or banking password. Just send or receive payment via your Mobile Phone. So, no doubt Paytm is a better service for online payment for your Website or Mobile App
Steps to Integrate Paytm Payment Gateway in Codeigniter
Let’s start the process of Paytm Payment Gateway Integration. It’s very easy to integrate in your application as compared to other payment gateways. Follow the below steps:
Step 1 : Register for Paytm Account
Sign Up Or Sign In for a Paytm business account from here: https://paytm.com/business/payments/online
During Sign Up Or Sign In process, you need to choose the option that Paytm Payment Gateway requires for a Website or APP. Also submit a valid Redirect URL, where you want to redirect the user after successful payment received.If you haven't submitted your business documentation before, then it is very important for you to do.
They ask for some official information like Business Types, addresses, Verification proof, Bank Details, etc. Although you can get Paytm sandbox credential without complete this process. But for production, you have to provide all required information.
After this process you will get paytm staging credentials, which included
- Staging MID
- Merchant Key
- Industry Type
- Website Name
- Channel ID
Paytm also send testing wallet details, which you can use for test transaction flow.
Step 2 : Download Official Paytm PHP Kit On Git hub
Paytm official announced library source code in all languages. Just download Paytm Payment Gateway kit in PHP from GitHub.
Extract the Zip file, there is the ‘PaytmKit’ folder which has all required files.
Step 3: Create Checkout form
We need to create a check out page to give user information Like email,mobile
<?php defined('BASEPATH') OR exit('No direct script access allowed'); ?>
<!DOCTYPE html>
<html>
<head>
  <title>Paytm Example</title>
  <meta charset="utf-8">
  <meta name="viewport" content="width=device-width, initial-scale=1">
  <link rel="stylesheet" type="text/css" href="https://cdnjs.cloudflare.com/ajax/libs/twitter-bootstrap/4.0.0-beta/css/bootstrap.min.css">
  <link rel="stylesheet" type="text/css" href="https://maxcdn.bootstrapcdn.com/font-awesome/4.7.0/css/font-awesome.min.css">
</head>
<body>
<div class="container">
	<div class="row">
		<div class="col-md-6 mx-auto">
			<h1 class="text-center">PayTm</h1>
			<div class="card-body">
                <form action="<?= base_url('pay') ?>" autocomplete="off" class="form" method="POST" id="formLogin" name="formLogin" role="form">
                  <div class="form-group">
                    <label for="name">Name</label>
						<input class="form-control" name="name" required="" type="text" value="K.K ADIL KHAN AJAD">
                  </div>
                  <div class="form-group">
                    <label for="email">Email</label>
						<input name="email" class="form-control" required="" type="email" value="[email protected]">
                  </div>
                  <div class="form-group">
                    <label for="email">Mobile</label>
						<input name="mobile" class="form-control" required="" type="text" value="1234567890">
                  </div>
                  <div class="form-group">
                    <label for="email">Amount</label>
						<input name="amount" class="form-control" required="" type="number" value="10">
                  </div>
				  <div class="form-group text-center">
				  	<button class="btn btn-success btn-lg float-right" type="submit">Pay</button>
				  </div>
                </form>
              </div><!--/card-block-->
		</div>
	</div>
</div>
</body>
<script type="text/javascript" src="https://cdnjs.cloudflare.com/ajax/libs/jquery/3.2.1/jquery.min.js"></script>
<script type="text/javascript" src="https://cdnjs.cloudflare.com/ajax/libs/popper.js/1.11.0/umd/popper.min.js"></script>
</html>
We have loaded the after create form view uses of form creation into the default controller Welcome.php
<?php defined('BASEPATH') OR exit('No direct script access allowed');

require_once APPPATH . 'libraries/PaytmKit/lib/encdec_paytm.php';
class Welcome extends CI_Controller {
	function __construct() {
        parent::__construct();
        $this->load->helper('url');
    }
	public function index(){
		$this->load->view('checkout-page');
	}
}
Step 4: Create Controller Pay & Configure Paytm Credential
Controller Top include libraries path require_once APPPATH . 'libraries/paytm-web/PaytmKit/lib/encdec_paytm.php';
You can also access it by globally defining it befor your __construct() function
define('PAYTM_ENVIRONMENT', 'WEB'); // change value PROD for production
define('PAYTM_MERCHANT_KEY', '**************');
define('PAYTM_MERCHANT_MID', '***************');
define('PAYTM_MERCHANT_WEBSITE', 'WEBSTAGING');
define('PAYTM_TXN_URL','https://securegw-stage.paytm.in/theia/processTransaction'); // for test
//define('PAYTM_TXN_URL','https://securegw-stage.paytm.in/theia/processTransaction'); //For live
By default source code ready for staging site. When you want to move to Production update the ‘PAYTM_ENVIRONMENT’ value by ‘PROD’.
Step 5: Load payment Form and auto submit form
We have created a method inside this class named index()
class Pay extends CI_Controller {
	function __construct() {
        parent::__construct();
        $this->load->helper('url');
    }
	public function index(){
		$this->data['paytm'] = array(
          "ORDER_ID"      =>"786ADI",
          "CUST_ID"       =>"1",
          "MOBILE_NO"     =>$this->input->post('mobile'),
          "EMAIL"         =>$this->input->post('email'),
          "MID"           =>PAYTM_MERCHANT_MID,
          "CHANNEL_ID"    =>PAYTM_ENVIRONMENT,
          "WEBSITE"       =>PAYTM_MERCHANT_WEBSITE,
          "INDUSTRY_TYPE_ID"=>"retail",
          "CALLBACK_URL"  =>base_url('pay/success'),
          "Amount"        =>$this->input->post('amount'),
          "marchent_key"  =>PAYTM_MERCHANT_KEY,
          "redirect_url"  =>PAYTM_TXN_URL
          );
        $this->load->view('paytm-payment-page',$this->data);
	}
}
Step 6: Create Payment Form paytm-payment-page.php
<?php
    $paytmParams = array();
    $paytmParams["ORDER_ID"] 	= $paytm['ORDER_ID'];
    $paytmParams["CUST_ID"] 	= $paytm['CUST_ID'];
    $paytmParams["MOBILE_NO"] 	= $paytm['MOBILE_NO'];
    $paytmParams["EMAIL"] 		= $paytm['EMAIL'];
    $paytmParams["TXN_AMOUNT"] 	= $paytm['Amount'];
    $paytmParams["MID"] 		= $paytm['MID'];
    $paytmParams["CHANNEL_ID"] 	= $paytm['CHANNEL_ID'];
    $paytmParams["WEBSITE"] 	= $paytm['WEBSITE'];
    $paytmParams["INDUSTRY_TYPE_ID"] = $paytm['INDUSTRY_TYPE_ID'];
    $paytmParams["CALLBACK_URL"] = $paytm['CALLBACK_URL'];
    $paytmChecksum = getChecksumFromArray($paytmParams, $paytm['marchent_key']);
    $transactionURL = PAYTM_TXN_URL;
?>
<form method='post' action='<?php echo $transactionURL; ?>' id='f1'>
    <?php
        foreach($paytmParams as $name => $value) {
            echo '<input type="hidden" name="' . $name .'" value="' . $value . '">';
        }
    ?>
    <input type="hidden" name="CHECKSUMHASH" value="<?php echo $paytmChecksum ?>">
</form>
<script type="text/javascript">
    window.onload = function(){
      var mform = document.getElementById('f1');
      mform.submit();
    }
</script>
Form action should be to this file ‘pgRedirect.php’ inside PaytmKit folder. This file handle checksum and other require details and redirect to you Paytm payment page.

This form auto submit by javaScript we are sending some required parameter as hidden variable like Channel ID, Industry Type and Customer ID. You have to pass these parameters along with form submit.